In the previous article of this series, we introduced the idea of collecting your pigments in the article, Pigments from the Earth. In this article, the second in the series, we will discuss the processes involved in preparing the samples of soil you have gathered — grinding, sifting, washing, drying, mulling, and storing the pigment.
In Earth Pigments: The Artists Oldest Paintbox, Carmi Weingrod wrote, "Thousands of years before the first recorded paintings, cave dwellers used colors dug up from the earth to adorn their bodies, clothing and implements to enhance their living quarters. These practices were closely tied to the cultural and religious rituals that were an integral part of the cave dwellers daily life."
There are five basic steps to prepare your pigment for use in an aqueous medium, such as tempera or oil paint. These steps are:
- Washing the collected sample
- Drying
- Sifting and grinding the earth
- Grinding the pigment
- Dispersing the pigment in a painter's binder
For most earth samples, these five steps suffice to prepare it for use as a pigment properly. However, another step, levigation, or particle separation using water, can further refine pigment. We will discuss that process in the following article of this series.
Tools Needed for Pigment Preparation
Now let's look at what tools you'll need to prepare the earth you collected for use as a pigment.
Most of the supplies you need are available from Natural PIgments either separately (see below) or in the.
| Item | Where to Find | |
 |
Natural Pigments Also, cooking supply stores and laboratory suppliers |
|
 |
Strainer or sieve | Strainer: Supermarkets or cooking supply stores Sieve: ASC Scientific or other mining equipment suppliers |
 |
Bowls, 2 to 4 liters | Supermarkets or cooking supply stores |
 |
Natural Pigments Also, specialized artists' supplies stores |
|
 |
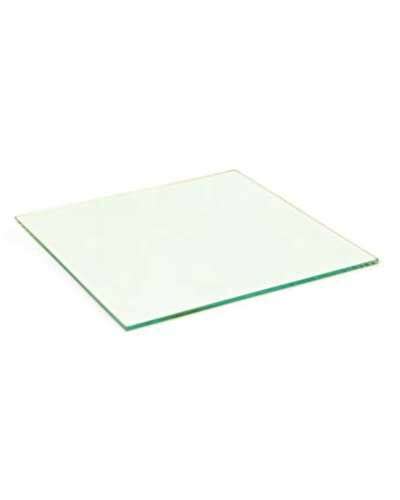
Natural Pigments Tempered glass, 10 x 10 x 1/4-inch Also, glass retailers |
|
 |
Spatula, palette, or putty knife | Natural Pigments Also, artists' supplies stores |
 |
Gloves | Latex, nitrile, or polyester gloves Pharmacies and drug stores |
 |
Dust mask | NIOSH-approved dust respirator Hardware stores |
 |
Natural Pigments |
CAUTION: Always wear a NIOSH-approved dust mask while grinding or working with any dry earth or pigment. Wear protective clothing and gloves while working with pigments in any form—dry or wet.
Washing the Earth Sample
Some earth samples you may collect will contain debris and organic matter that is undesirable in pigment preparation. Larger pieces of roots, twigs, leaves, grass and other organic matter can be removed by hand before grinding. If you find this kind of material in your sample, it is likely there will be small pieces that will be difficult to remove entirely by hand. In this case, it may be helpful to wash your sample.
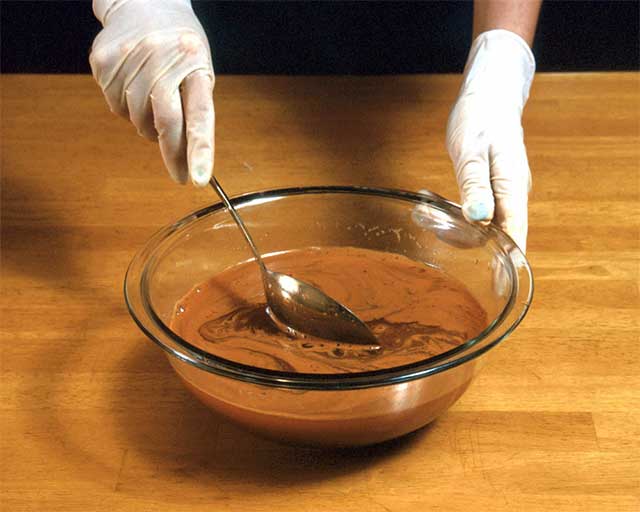
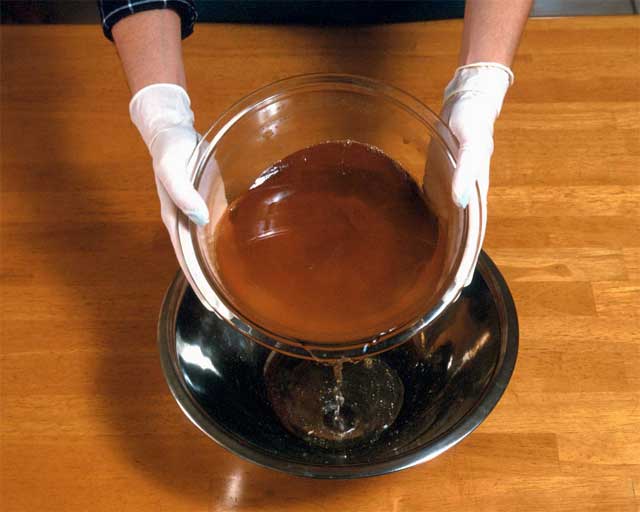
To wash your collected earth sample, place it in a bowl and cover it with water. Stir the earth vigorously around the bowl. You will notice scum forming and debris floating on the water's surface. Allow the water to remain still. Notice that the water will be somewhat clear while the scum and debris float on the surface. The lighter weight of the organic matter causes it to float where it can be siphoned or poured off.
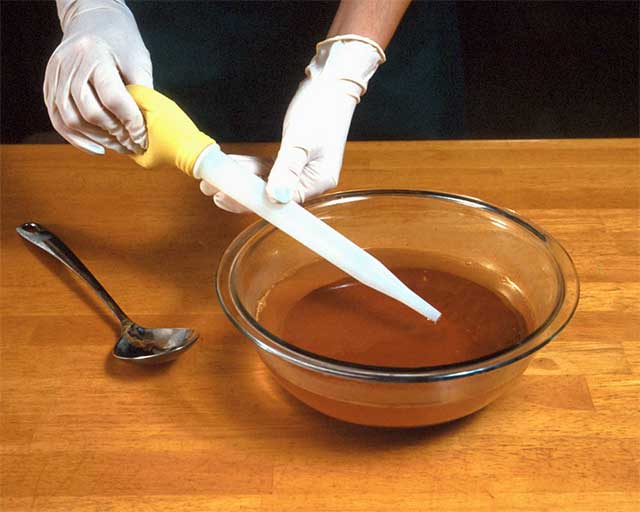
Allow the earth to settle in the water bowl until it is nearly transparent. Siphon or pour off the floating debris and scum from the surface. Repeat this washing procedure until you do not see any scum or debris float to the surface.
Do not mistake the cloudiness of the water for the organic contamination of the earth sample. This is usually caused by fine particles of the earth suspended in the water for a short time. Within five to ten minutes, the water should become nearly transparent. Suppose not. This may indicate that it still contains debris and organic matter. Avoid pouring or siphoning the fine pigment particles, as these are usually your finest pigment.
Drying the Earth
Before grinding your dry pigment and then dispersing it in your paint binder, it is essential to dry it. There is nothing magical about this process. Scatter it onto glass or heavy plastic sheeting and place it in a dry area out of direct light. Within a few days, the sample of the earth should be dehydrated.
Avoid drying the sample in sunlight or an oven. The higher temperature will adversely affect your pigment, but if the earth has a high clay content, it will form hard cakes that will prove challenging to pulverize.

Sifting the Earth
Most collection samples contain chunks of varying sizes. Since grinding is most easily accomplished if the size of the pieces to be ground is relatively small and somewhat uniform, it is helpful to do some sifting to achieve uniformity and obtain a selection of smaller pieces to begin the process. Large kitchen sieves are reasonably available in most supermarkets and are good tools for this process. Old-fashioned kitchen crank sifters can also be helpful. You may find these items in junk stores and second-hand stores, or they can be purchased new. Professional sieves with calibrated mesh screens are also available but are pretty costly. Professional sieves come in many mesh sizes.
Sift to remove large pieces from the sample. Doing so allows you to separate the sample into different particle size grades to make grinding easier. You may have large pieces, gravel, and sand-sized particles.

Grinding Earth to Make Pigment
The next step in preparing your earth is to reduce large pieces to smaller ones by crushing, pulverizing, and grinding the sample with a mortar and pestle. Using a mortar and pestle, pulverize your sample into sand-sized particles and grind them into smaller particles. For pieces larger than gravel, you may have to break them up with a hammer.
Continue to sift the sample in the mortar and pestle and divide it into different grades. Repeat grinding each grade until you have the desired particle size for your pigment.
CAUTION: DO NOT use your kitchen mortar and pestle for grinding pigment. Because your studio mortar and pestle may be used to grind more toxic minerals, it must not be used for food preparation at any time after that. You are urged not to break this basic studio rule. Your health and your family's health are at stake.
Dispersing Pigment in Water
It would be best if you had earth in a dry powder form, ready to add to your paint medium. The best way is to disperse thoroughly using a muller and grinding surface, such as thick glass, granite, or marble slab. The idea here is not to pulverize the pigment but to disperse it in the paint binder. The muller and grinding slab cannot reduce gravel-sized particles to powder. This should be done with a mortar and pestle. However, the muller can further refine the pigment particles while dispersing them in a painting medium.
Grinding with a muller gives you more control of the particle size of your pigment, which means you can achieve various paint textures and colors with a single pigment. Texture in your paint will give you more variety in your painted surface, offering you many options for expression and revelation.
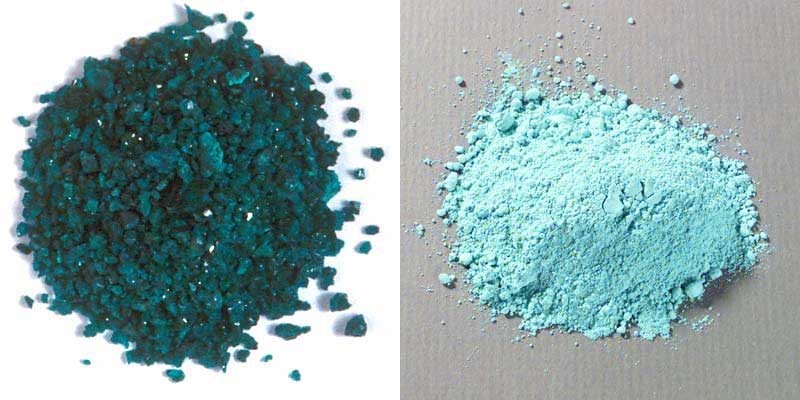
Coarse particles of dioptase (left) and very fine particles (right) of the same mineral demonstrate the wide range of hues possible from a single mineral.
For example, malachite is a mineral pigment that benefits from careful grinding. Grinding this natural mineral produces hues ranging from emerald green to pale green due to the sizes of the pigment particles: the finer the grind and smaller the particles, the less intense its color. Dioptase and azurite are also affected by the size of the pigment particles. Grinding these minerals allows you to control the resulting hue and saturation of the pigment. Other minerals, such as cinnabar and lazurite (lapis lazuli), can be ground to very fine particles with good results and gain in chromatic intensity. Grinding your pigment allows you to control the final appearance of a pigment, thereby achieving the best results from each pigment.
In this article, we will demonstrate how to disperse pigment into the water for use with gum arabic (watercolor), casein, animal glue (distemper), or egg (tempera).
Place your grinding slab on a firm surface. You may find it helpful to put a wet cloth beneath the glass slab to stabilize it while grinding. An old undershirt or washcloth will work well for this. It will become stained in the process and should be reserved for this use only. Only a neutral white colored fabric should be used beneath the grinding surface so that you can adequately evaluate the color of the pigment.

Adding Water
Place a small pigment pile (10 to 50 grams) on the grinding surface. Add a few drops of distilled water to the dry pigment. Do not add too much water to start.

Mixing the Pigment and Water
Mix the water into the pigment with a spatula, palette, or putty knife. The correct amount of water is added when the pigment has the consistency of toothpaste. It is easier to judge the thickness of the paste once you begin grinding with the muller. Hence, it is better to begin grinding with a stiff paste than one with excess water.
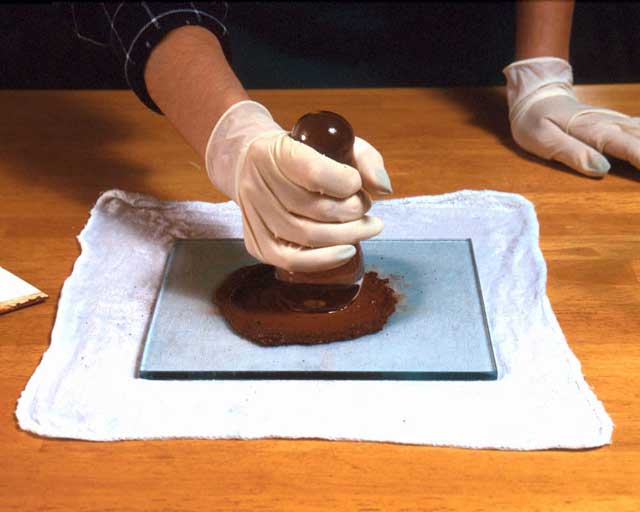
Grinding Away
Holding the muller firmly with the heel of your hand and thumb up, slowly move the muller in a circular motion while keeping the pigment in the center of the grinding surface. The pigment will slowly accumulate along the outside of the circle. Use the spatula to move the paste to the center of the grinding surface to continue grinding.
If the paste becomes too stiff, add more water, a few drops at a time. Do not worry if suddenly the pigment is thin and watery. Add more dry pigment to the mixture.

Periodically lift the muller from the grinding slab and clean off any accumulated pigment. Sometimes suction will form between the muller and the grinding surface, making it difficult to move or lift the muller. Use the spatula as a lever to raise the edge of the muller. Then slide the muller horizontally off the grinding surface.
A Test for Proper Dispersion
A test for proper dispersion in water with tempera paint intended for use as floats or glazes is to drop a small amount of wetted pigment on the surface of distilled water. If the pigment floats on the surface of the water, it has been ground to the proper fineness for that purpose.
Evaluating Particle Size and Color
Keep in mind that some pigments lose their intensity when ground too finely, so evaluate your grinding results by observing the color of the pigment. Take a small amount, mix it with your paint binding medium, and brush out a sample on a non-absorbent surface to evaluate its color.
Cleanup
To prevent contaminating your subsequent pigment, clean your tools very well. If you have been grinding with water-based media, wash with warm water and soap. If you grind with oil, clean up with turpentine, mineral spirits, or lacquer thinner. Always wash your grinding tools with warm water and soap after cleaning them with solvents. You may remove caked-on pigment and paint with any kitchen scouring powder, borax, or pumice with the muller on the grinding surface. Follow this by washing with soap and warm water.
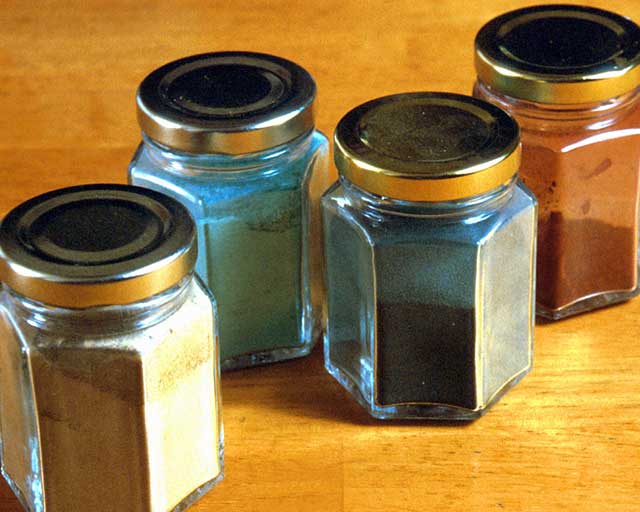
Storing Your Hard-Won Pigment
Once pigments have been dispersed in water, they should be stored in bottles or jars. Many fancy glass jars are available that add nostalgia to the art studio, but practical considerations are most important in selecting the correct container.
To avoid spillage should a pigment container fall, I strongly recommend plastic jars for storing dry or wet pigment. This is especially true if you live in an area prone to earthquakes or other natural disasters where a broken pigment jar would only add to the disaster. With screw-on lids, wide-mouth plastic jars, such as PET or LDPE, make ideal containers for your pigments. Plastic peanut butter jars work well for storing larger amounts of pigment. Many other plastic food jars can be co-opted for pigment storage after serving their purpose in the kitchen. A glance through your refrigerator is likely to identify several possibilities. Natural Pigments also offers several sizes of plastic jars that are useful for storing dry or wet pigments.
CAUTION: Containers previously used for pigment storage must never be used for food storage or preparation after that.
Screw-on lids are a better choice over snap-on lids because the latter is likely to pop off should the container fall. Also, select lids without liners, as these may encourage the growth of fungus or mold.
Whichever type of container you choose, it is essential that you thoroughly clean it before using it to store wet pigment. This will help to ensure that the pigment is not contaminated by fungus or mold.
Before storing dry powdered pigment, be sure it has completely dried. When ready to use it, follow the procedure for dispersing your pigment in the paint binder.
Identifying Your Pigment
Labeling your storage container is an essential studio practice. Be sure to mark a skull and crossbones on whatever container you use to indicate it is no longer helpful as a food container once pigment has been stored. Also, note details about the pigment. The chart below was suggested in the first article in this series as a possible way to note pigment information in your Collection Sample Notebook. This same information will be helpful to note on your pigment storage container. You may have other information you would like to add to your containers:
| Name | Auburn Orange Ochre |
| Date | September 2000 |
| Where Found | Road cut 45 miles west of Lake Tahoe in the Sierra Nevada Mountains, California, 2 miles east of Auburn, 50 feet from Highway I-80. |
You have now learned the central part of pigment preparation. Now the fun begins—using the pigment you have made!
Subsequent articles in this series, Pigments from the Earth, will address levigating and testing pigments. Watch for the following article to learn more valuable skills that can help you understand pigments better.